The more-or-less last step on the door proper was fitting a transom window to fill the small gap above the door. The glazier supplied 1/4” glass, and the frame around it is from the same quarter-sawn oak as the rest of the project.
In the first photo below: the door as originally painted, with empty space above. Second photo shows the cardboard-filled transom, third is the completed transom.
In the last two photos, the completed door from inside and outside. (Not entirely happy with the color on the outside, but that will be corrected another day.)
Now: on to replace the IKEA stepstool in the kitchen, so the door will have a step it can be proud of.
The door, as purchased, had two panes of Florentine (patterned, opaque) glass. The two lower panes were empty. The local glazier installed clear laminated glass, an enormous improvement by itself.
Given the placement of the hinges the original outside of the door is now inside. The paint had to be stripped, a day-long job.
The next day was prime-and-paint day. Even stripped or just primed, the door is a vast improvement.
In preparation for this project I purchased forty feet of quarter-sawn oak, to match the original woodwork in the house. We had a few ideas about how to hang the new door but we knew that until the old one was out we couldn’t be sure. The old door was almost comically installed, a nominal 32” door fitted into a 34” opening, with extra lengths of oak installed to make up the difference and an oak “soffit” to fill the gap above the door.
Since there’s no longer a door, we’ve got a tarp to keep the weather (and the feral cats) out. In the first two images you can see where the pulleys were for the old sash windows; we removed the sash weights, still in their pockets, and filled the gap with fiberglass batting. That will make a big difference come winter.
We installed new oak 1×10 around the inside of the opening; this will serve as the stop, and the new door will be hinged directly on the original window opening. The door sill is actually 4/4 stock, installed just slightly off-level to allow rainwater to flow outward.
After applying stain, we’re ready to hang the door.
Since my last adventure — some six-plus years ago — we’ve moved. The “old” house was a suburban condominium built in 1977; after thirty years we finally left it behind and moved into the city, to an actually old house built around 1892. The plan is typical of houses from that era: kitchen and formal dining room on the ground (“garden”) floor, with access to the yard back behind the kitchen; front and rear parlor one level up, with bedrooms above on the next two floors.
We have reconfigured it some: the garden floor is a standalone apartment; our kitchen is in what was originally the rear parlor. A previous owner removed one of the large windows and replaced it with a door to access a deck atop the small shed-addition.
Problem: The door was a home-center interior door. You can imagine the havoc wrought by several years of northeastern winters, summers, and hurricanes. The door no longer hung straight enough to latch, and therefore couldn’t be locked.
Problem: The steps up to the door were, well, ugly. Solid enough, sure; but the natural light wood and clear glossy varnish didn’t really match the original woodwork.
Problem: Once we had stairs heading down from the deck into the garden we realized we needed to replace this door sooner rather than later. (Replacement had always been on the list.) We had picked up an old exterior door (as well as a few interior doors) from an architectural salvage emporium in Bridgeport back in January. Installing it jumped to the top of the list. Of course, other things have been popping up…..
Over the weekend I drilled the handrail and cut the balusters. Since I didn’t want to put clunky shoes on the treads (to cover the 5/8″ holes for the 1/2″ balusters), I needed half-inch square holes.
After marking the treads for the holes, I put a drill stop about 3/4″ down a self-centering twist drill, then drilled through the blue tape and into the treads. I don’t have a mortising machine, but I purchased an inexpensive 1/2″ mortising bit and used just the chisel part to square off the hole. It worked like a charm, and I was able to fit the balusters into the holes without much fuss.
“Spring-Bolt” component pieces.
Once the balusters were cut to size, the handrail was fairly easy to secure. Starting at the bottom, I fitted each baluster into the rail while my son slowly lowered the top end. Using another spring bolt, I fastened the return to the top end. I pulled off the railing and drilled holes for two 1/2″ dowels in the newel, and matching holes in the end of the bannister, then put the whole thing back together. Two 18ga nails from the nail gun held the bottom end while the glue set; the top is secured by a single wall bracket.
The last step was to use some epoxy gel (“suitable for vertical applications”) to secure the balusters in the handrail: not all of them were a tight fit, and the shaking could be quite noisy.
It’s been a long time coming, but definitely worth the wait. These two photos speak for themselves:
This is the part where there’s really no room for error: If the balusters aren’t absolutely straight and square, the entire thing will look like something out of Disney’s Haunted Mansion — if it had practical stairs. (That’s all fine in its place, but it’s not something I want to live with.)
I go to bed at night thinking about how to lay this out. Not so much where to drill the treads, but how to transfer the mark to the underside of the railing without too much fuss or too many specialized tools. That Bosch laser level looks like just the thing, but I’m not about to drop a C-note on a tool I only need for ten minutes.
The other day I realized I don’t have to transfer all of the centers, just the first one — as long as I have a story stick to mark the rest of them. Tonight I had my second great epiphany: I don’t need to transfer even that first marking with 100% accuracy, because I haven’t drilled the newel or handrail for dowels yet. I still have some room for error and adjustment. Not a lot, but enough.
First step is to lay out the treads, marking them for the centers of the balusters. The building code requires no more than a 4-inch gap between balusters or spindles. I calculated that putting two balusters per tread would leave me exactly a 4 1/8″ space between them. So I’ll have to lay out three per tread, but standard English measures are problematic: the “tread run” — the horizontal distance between risers — is 9 1/4″ inches, and three doesn’t go evenly into 9.25. I tried the metric side of the tape and found that the run was 23.25 centimeters, which puts the balusters on 7.75cm centers.
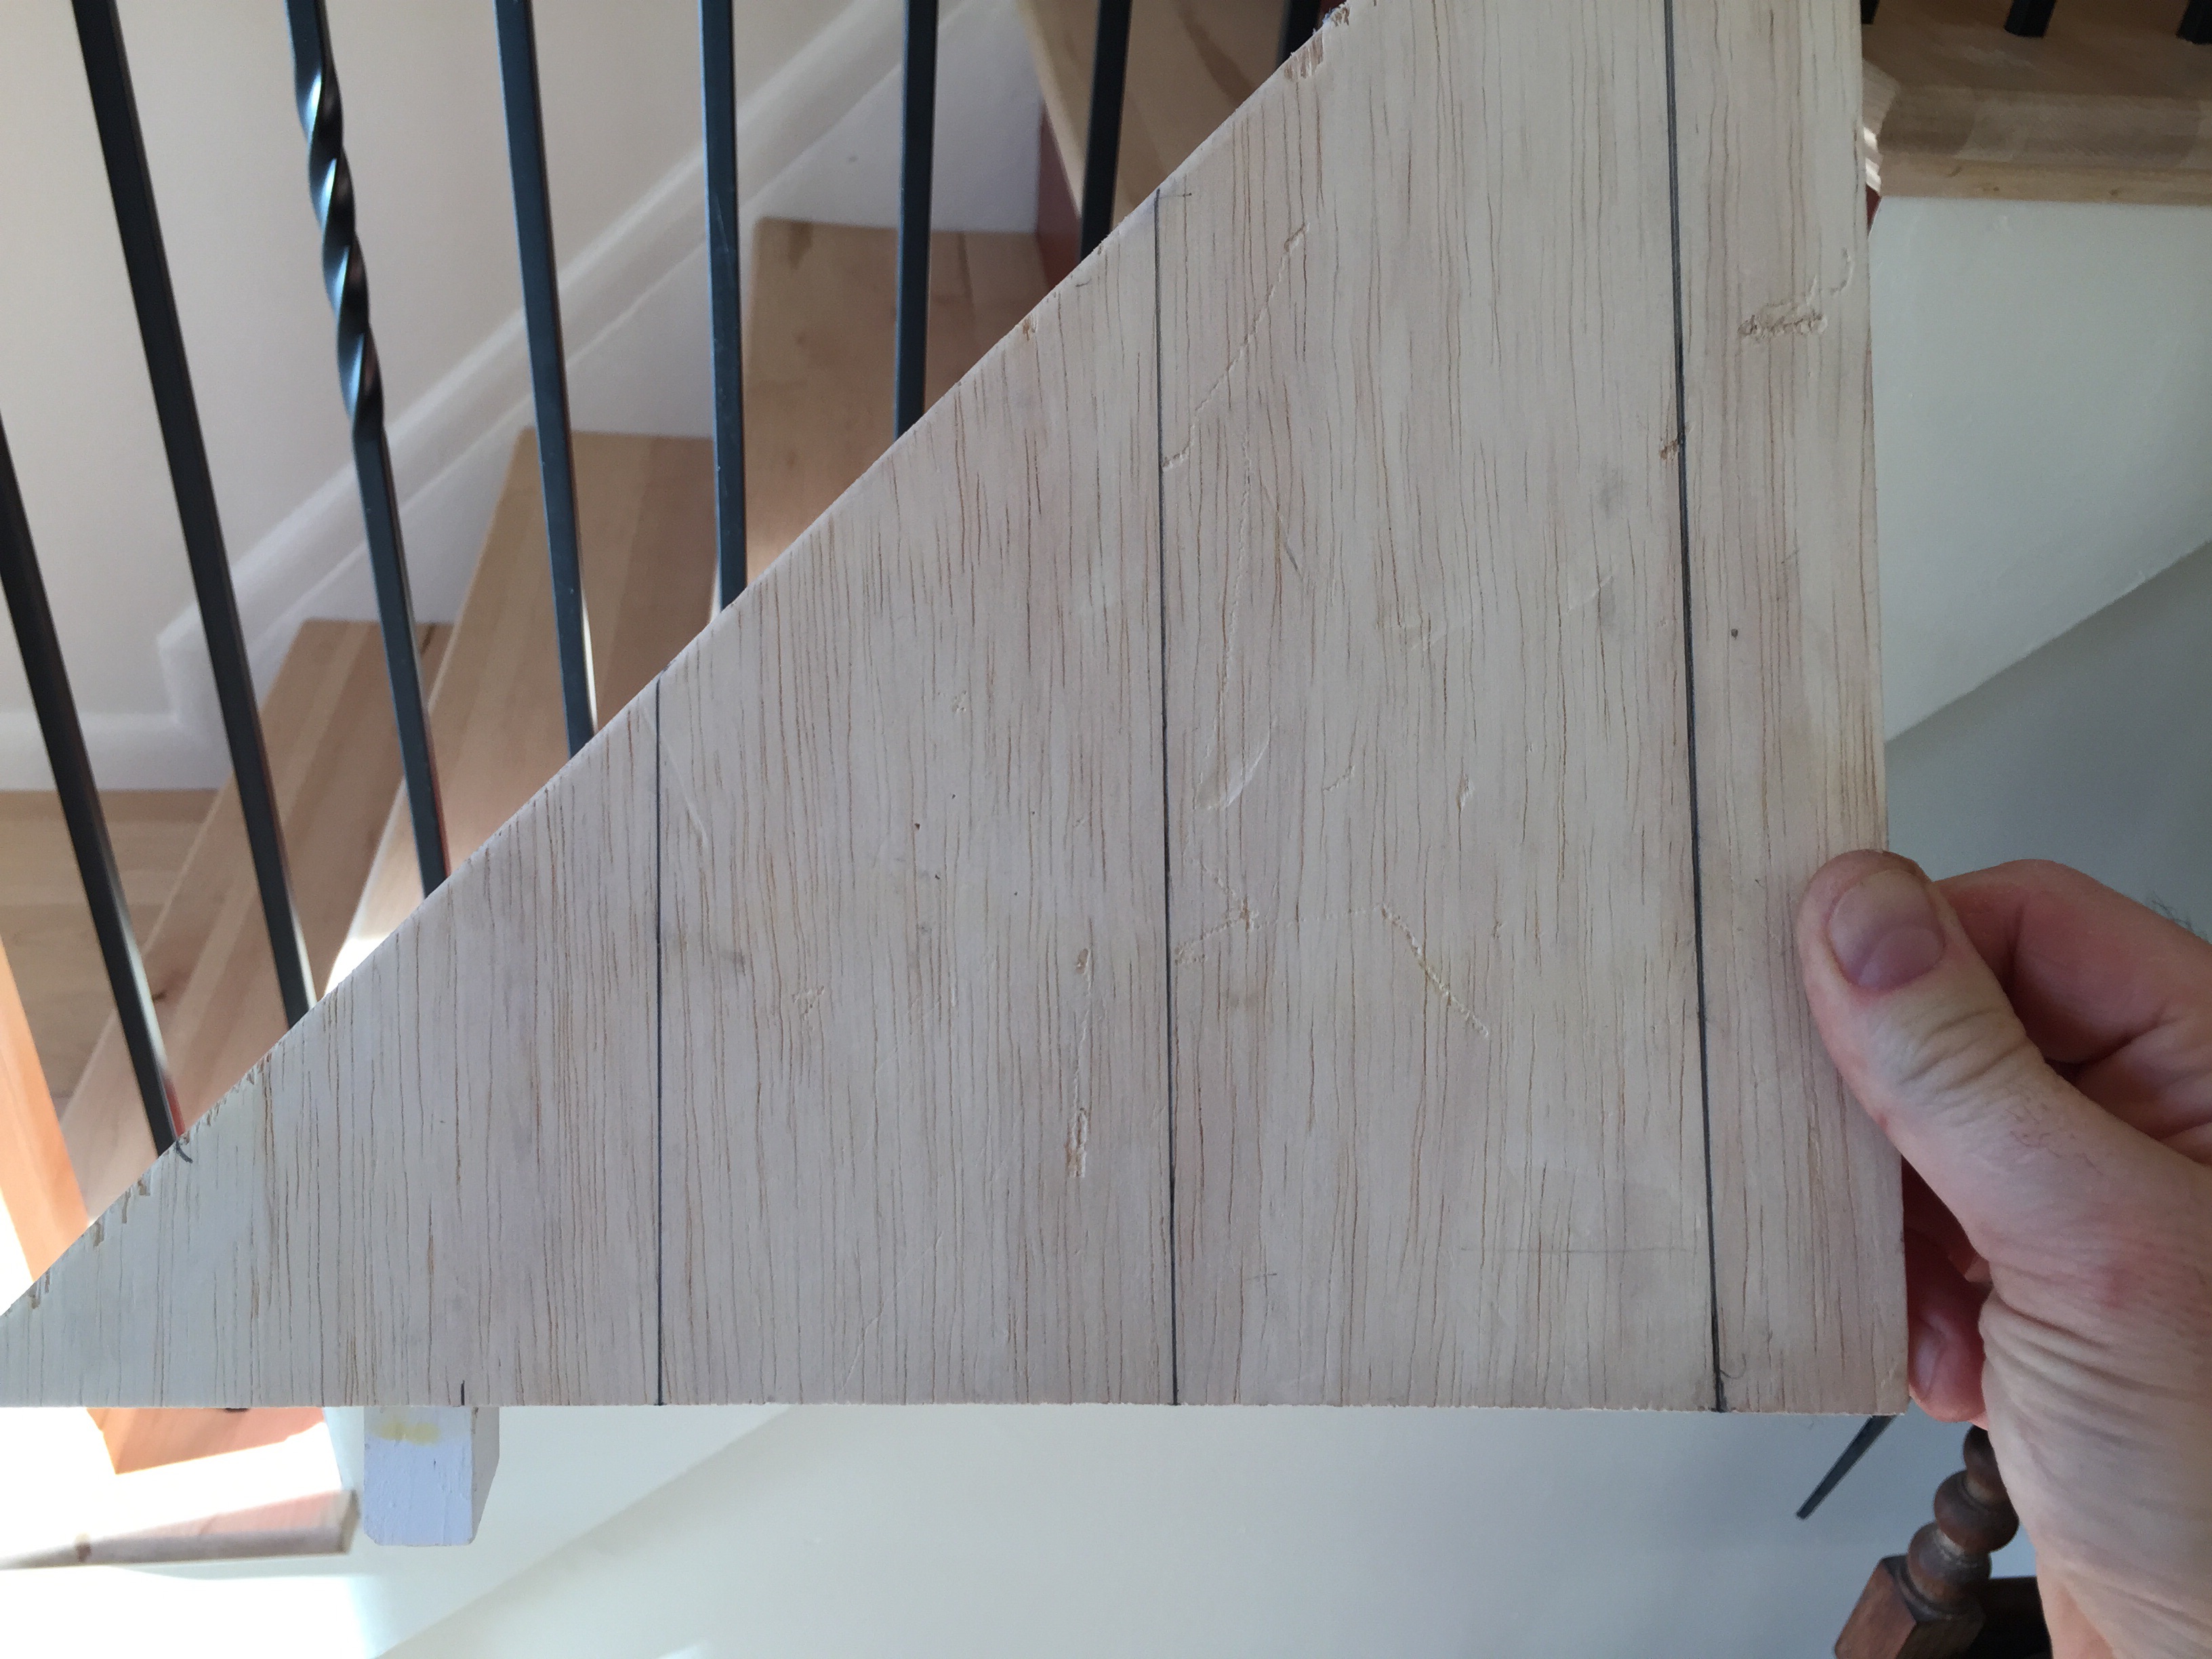
Making a pitch block.
I made a pitch block — a triangle that I could use both as a story stick for the handrail, and a guide for the drill. The idea is simple enough: rest a long straight edge across the noses of several treads, and clamp it in place. Next, rest a scrap piece of plywood — with at least two square edges — on top of the straight edge. Use a level to mark a vertical line from uppermost corner of the plywood back to the straight edge.
The resulting triangle, once it has been cut, is your pitch block: a right triangle whose hypotenuse runs parallel to the finished handrail. After marking the base of the triangle I can transfer the centers to the hypotenuse using a simple square. Now laying out the centers on the handrail is simple: I place the block at the first hole, and mark off the next two centers; repeatedly moving the block lets me mark the centers two at a time until the whole job is done. Cheaper than that $100 laser gadget, and probably faster — and just as accurate.
I needed three lines (shown on the scrap plywood in the photo) to transfer the marks from the treads to the handrail. I measured off a fourth marking on the base and transferred it to the hypotenuse, so I’d be able to mark off three holes in the handrail at a time.
Pitch block used as marking template.
First, the treads: the piece of molding glued near the point sets the block at the correct distance from the front of the tread (since I had little confidence that the risers were all perfectly vertical, given the underpinnings). I held the base along a line penciled on to blue tape on each tread, then marked each of the three holes. Next, the handrail. We had marked the centerline along the bottom, so it was simple to hold the block along that chalk line: align the first mark with the place for the first hole, then mark off the next three holes. Shift the block down to the last hole, line up the marks, and repeat the process until all 18 holes are marked.
When measuring the treads and calculating the correct placement of the balusters, I made sure that the first baluster (at the bottom) would be evenly spaced between the newel post and the first baluster on the second tread. Given the stakes, I placed the first mark 1/4″ from the end of the handrail — half the width of the baluster — and proceeded from there. In the end, I had to trim the railing just a little bit to make everything align — but trimming beats shimming, every time.
Using a 1/2″ spade bit, I drilled the holes in the handrail. Confident that the marks were correct, I flipped the railing end-over-end and laid it along the stairs, then drilled straight down. For once, everything went according to plan.
Finally, finally: the home stretch. The baseboard moldings, and the bannister.
I. Angles
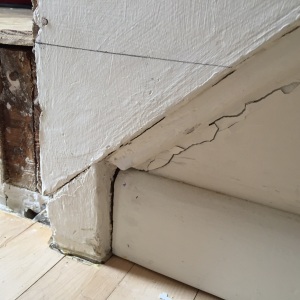
I’ve never been happy with the baseboard moldings around the stair: The builder simply ended them at the end of the landing, running a piece of quarter-round down the top of the stringer. (The stringer itself is a tale of woe: the entire stair, presumably built off-site and delivered to the contractor, was installed slightly askew so that while at the top the stringer sits entirely proud of the wall, at the bottom the stringer sits half an inch within the wall. The quarter-round was ripped at a very acute angle to accommodate and — one assumes — hide the fact of the less-than-square construction.)
The original molding: not a thing of beauty.
The joint at the top is wrong, it should hit the landing about two or three inches in from the nose to evenly bisect the angle.
I knew that I wanted to continue the line of the baseboard, so that it hit the stringer and followed the slope of the stair to the bottom. I also knew that setting the entire width of molding atop the stringer would be too “heavy” and that I’d have to rip the molding to about a two-inch height. (In truth, I’d have liked to have made it narrower still, but that made calculating and cutting the angles where the stringer hits the upper landing even more tedious, and resulted in some odd-looking joints in the millwork.)
The angle at the topmost landing.
Almost there…
After a bit of experimenting with scrap pieces and the chop saw, I got the angles I wanted, the miters perfectly bisecting the angles between the stringers and the landings. I cut the rest of the moldings to fit (including a cutout for the HVAC return) and painted them before nailing them in place.
Use the router’s round-over bit to finish the cutout.
A better look than the original.
Before moving on to the railings — and the balusters, something of a frightening prospect from the start — I wanted to cut, paint, and nail every other piece of molding. While there weren’t many, the one thing I’d learned from installing both the millwork around the stair, and the treads themselves, is that scribing the molding to the undulations of the floor might be a bore, but it’s far less work, far less messy, and far, far better looking than trying to fill the gaps with caulk. The caulk never looks quite right, and you end up with smudges and smears of the stuff all the way around. Better to spend a few minutes with a pencil and a couple of bastard files, even if it means extra trips to the frigid garage to get the curve just right.
Another important lesson: bevel everything! When you are scribing to the floor (or to the wall), bevel the backside edge wherever it won’t be seen. Obviously this is impossible at the front of a tread, where the nosing must meet the wall completely. But half an inch behind the nosing, use the bastard file to bevel the edge of the tread. Bevel the bottom edge of every molding, so that the edge meeting the floor is a fraction of the actual depth of the molding. This simple step will result in a much neater line, and will spare you enormous aggravation (and the temptation to break out the caulk gun).
II. Newel
The railings and newel post are solid maple, and have been finished with four coats of Danish oil. Following advice (and excellent advice it was) from the Intertubes, I applied each coat fairly liberally, let it sit for no more than thirty minutes, and then wiped it down. Eight hours (at least) between coats, and by the fourth coat the wood has a soft patina: not glossy, but a smooth satin finish that is just a bit darker than the bare wood — slightly darker than the Bona finish on the stair treads, which I think makes a nice contrast. It certainly feels better to the hand than any polyurethane finish could, and it’s more easily maintained. If it begins to look worn in places, a little 180-grit sandpaper and a little more oil will make it good as new.
My first attempts with the oil were to wipe it on with a rag. I found that I could flow it on better using 0000 steel wool — which I was going to want to use for subsequent coats, anyway, to knock down any raised grain and keep the whole piece smooth. The railings took three days, and the newel post took another three, but I’m very pleased with the final look.
That contraption next to the newel holds up the lower end of the railing while I get everything else in place. With the railing secured to the wall bracket at the top, I can mark the post, then drill the post and the railing for dowels. The return at the top (like those on the shorter handrail in the center photo above) is joined with glue and an internal “spring bolt” which holds the joint perfectly while the glue sets up. I’d have used one to secure the newel, but the post bolt requires about 4″ of solid wood under and I have only 2″ — the old and new treads — so I went with the bracket kit and moldings. (The poplar moldings are a decent match for the maple grain, but the color is off. A soak in wood bleach, followed by the same oil treatment as the other parts of the railing, brought them to an acceptable shade.)
Today I turned my attention to the enclosed treads — the last three steps, above the second landing. These treads (and risers) have to be scribed to both walls, and standard measuring devices — a tape measure or folding rule — aren’t going to do the job.
Home centers sell a “stair gauge” for about $17. It’s two pieces of plastic, and you are supposed to provide your own length of 1×2. Nicer ones can be bought online; prices range from about $50 up to over $160. If I were in the business of installing stairs, I’d consider something at the high end. Since this is a one-time project, the idea of spending a nickel more than I have to is galling.
Measuring the first riser.
Instead of plopping down my $17 and rooting around for a length of 1×2, I put together my own stair gauge using scraps of floorboard (left over from the installation downstairs) and about $4 worth of hardware: a couple of 1/4″ bolts, and a couple of threaded inserts.
This job would be easier if the walls (and stringers) were straight.
After carefully transferring the gauge to my riser and penciling the cut lines (leaving about 3/16″ excess), I did the same for the first tread. I cut the pieces, then carefully scribed the walls and used the belt sander and a bastard file to fit the contours. When each piece was a good fit, I worked on the piece above until all three treads (and four risers) were ready. After painting the risers, I applied the urethane adhesive and 2″ nails to secure everything in place.
On to the open treads! First, the next riser was scribed to the wall-side stringer. My daughter noticed the riser leaning against the stair, waiting to be installed. “I’m pretty sure that’s not straight,” she noted drily, observing the gentle curve. “Nope,” I said. “The stringer isn’t just ‘not straight’ relative to the wall. It’s not flat.” Each and every riser is just slightly concave on the wall end.
With the first riser painted and secured in place (18ga nails and Bostik’s Best urethane adhesive), it was time to move on to the tread. First, it gets scribed to the wall. Because we want the overhang on the open side to be 1-1/4″, we measure off the extra distance and then transfer it to the other end.
Measuring the excess.
With the end cut, and shaped to fit flush against the stringer, we glue down the tread and move on to the next riser.
The process is repeated for each tread and each riser. To save time, and because I wanted to paint the risers before installing them, I prepped several treads and risers at once. After the second coat of paint was sufficiently dry (about an hour), I glued everything in place and nailed it down.
A lovely curve — repeated on every tread!
Beveling behind the wall (nosing cut away).
The last open tread was trickier, because it had to be cut to fit around the wall; it’s not a completely open tread, with a wall where the stair turns to the right. To make it fit more easily, I beveled the tread where it meets the wall. On the right end, where the bevel is cut around the wall, it’s not an issue. On the left end, the bevel ends about two inches from the front edge of the tread so that it’s completely hidden.
Upper landing, cut to fit around the wall.
Finally, I was ready to do the upper landing where the stair turns. Once again, I edge-glued four treads together — after ripping to the correct cumulative width and scribing for the wall near the nose, and the upper stringer at the back. You can see the cutout for the stringer best in the third photo, and the notch for the wall in the second. Be careful not to step in the glue!
I’ve been applying the Bona sealer and polyurethane finish as I go, three or four steps at a time, to minimize the traffic on unfinished wood.
A work-in-progress: landings done!
Only three more treads (and four risers) to go! After that, all the moldings and trim, and then the newel and handrails.
The first step, after stripping the disgusting carpet and putting it out on the curb, was to cut off the overhang on the rough pine treads. Using a homemade jig, I scribed the line of the existing riser onto the top of the tread; then we screwed a fence 1-1/2″ back from that line and cut the nosing with the circular saw. Various multitools, reciprocating saws, and jigsaws got us the last few inches to the wall.
The weird, non-functional support under the open stringer.
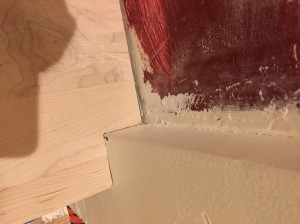
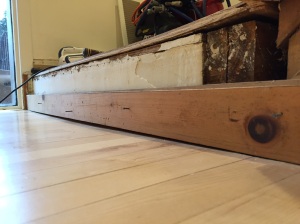
With the old treads cut, I turned my attention to the new treads. The first order of business was to replace the support under the end of the open stringer, which allowed the entire stair to ride down (or up) over 1/4″ with every step on (or off) the bottom tread.
Hmmmm. This floor isn’t exactly flat.
Since the riser had to be replaced, I cut the bottom of the stringer to the same height and used a piece of 1×10 poplar, scribed to the floor, to replace the riser and support the stringer. From the photo here you can see the importance of scribing the new riser to the floor: it’s a mess. Judicious use of the bastard file and various sanders made reasonably quick work of it. It’s not perfect, but it’s close enough — and a big improvement over what had been there for the previous twenty-odd years we’ve been here.
Riser, first landing, and new support for the stringer.
Now it was time to start thinking about the new treads.
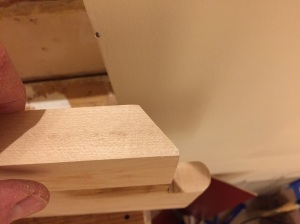
The treads I’d sourced weren’t actually solid (monolithic) maple,
Delamination
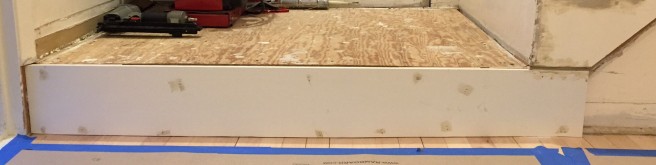
but glued-up strips. Unfortunately, some of them were beginning to delaminate and no amount of clamping and re-gluing was going to fix that. For the two intermediate landings, I was planning to glue up four treads to make a larger platform.
Love the Kreg screws!
First landing, ready to be flipped and set.
I decided to do the best I could, using pipe clamps and pocket screws, and used the circular saw and a length of maple floorboard (as a rip fence) to make sure all of the edges were straight and square. The photos show the underside: four treads glued edge-to-edge and secured with Kreg screws, plus more screws where the individual treads were beginning to delaminate,
A little wood putty filled the remaining gaps, and the entire slab was belt-sanded down flat. It’s held in place by urethane adhesive; a couple of 2″, 16ga finish nails around the edges (where the moldings will cover them) are enough to secure it while the adhesive cures.


